Total Pageviews

Withdrawal symptoms!!!

20 Dec 2016

So what happens when your van is away at the paint shop for a few weeks and you need something to do?

1. Buy and erect a shed.
2. Move all the non essential bits and pieces, from the garage, into the shed.
3. Clean and paint the inside of the garage.
4. Put down a new interlocking tile floor.

The result is:-


Garage is single size measuring 5 x 2.5 metres.

Tile flooring is from Barkley Plastics, High Gate St Birmingham.
Sold as Plasfloor in 200mm square PVC interlocking tiles at 4.5mm thick. 

www.plasfloor.co.uk

Just lay them in place and tap them with a rubber mallet to lock together.

Took 5 hours to lay this floor complete including cutting all the edge tiles.
Laid on to the existing concrete floor.

Used 13 square metres of tiles (325 tiles)

These tiles are Dark Grey in the centre section and Light Grey the rest.
Other colours available.

Have painted the concrete floor edge and up the wall, one brick high, with grey floor paint before laying tiles.

Hopefully they will prove durable...certainly look much better than the previously  painted floor.


Austin 101/MorrisJB Records at Gaydon

15 Dec 2016

It came as quite a pleasant surprise to read in the Morris Commercial, Autumn 2016. magazine 'Recalling' that the British Motor Museum Heritage Trust at Gaydon has surviving production records for 1957-61 Austin 101/Morris JB vans for Chassis numbers 36048 to 48368.

As my van's chassis number came inside this range I duly sent away my cheque and a month later got a Heritage- Certified Copy of the Factory Record.

In my case I knew my van was registered on the 27th  January 1960 from the log book. What I didn't know was the date of manufacture.

The Heritage  Record showed my van built on the 22 December 1959 and despatched on the 31 December 1959.

Now I have the choice to MOT or not!

First I have to get the van back from the paint shop where it has been on 'low priority' since mid Sept 2016... but it is getting there!


5 years on!

July 2016
Thought I had better post a few photos to show that George still exists, as its some time since I made any significant progress! I am now actively seeking quotes for having the paint work done.
All my efforts on the body are over despite the two side panels, rear of the doors still not being perfectly straight. 
Masking tape indicates line of two tone colour split.
All other bits and pieces are waiting for the paint job and then the final rebuild.


British Railways stuff

Jan 2016


Since deciding to finish my van with a 'Blood and Custard' British railways livery I have been on the look out for BR hardware to add to the interior, once the exterior is finally done!

So far have collected and restored a number of items, including the following:-.

Porters sack truck (made by W. GOODYEAR & SONS Dudley)

Cleaned painted and added 'British Railways' signage.


Signal lamps- One with a wick that probably pre-dates 1960 by some time and a second , Bardic, battery operated, that I suspect is a little later than 1960. Both with B.R. raised lettering.  Some railway buff will no doubt  put me right on the dates.!


Have also accumulated a number of smaller items including books, magazines, timetables etc.
Then made a display bookcase to house some of these. Hope to hang this in the van ..somewhere.


If you have any British Railway related items, circa 1960, such as wooden boxes, sacks, luggage, packaging or anything else that you may want to part with...please get in touch.


Minor Mods

Jan 2016

Here a few small things I have done, some old ,some recent, that are not in the workshop manual or parts list!

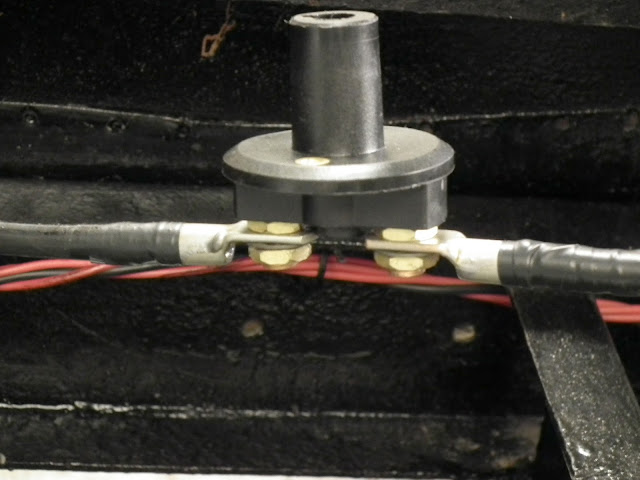
1. Battery switch.

Added this some time ago to isolate the battery more easily when working on the electrics. It sits inside the drivers seat box with its connections made under the floor.


2. Power socket.
Added this to provide a source of power for accessories and a means to trickle charge the battery. Positioned in the drivers foot well.


3.Rear door stays
Fashioned some rear door stays to hold the doors just past the 90 degree position. Used a hinge, steel strip (20 x 3 mm) , a pin from a shackle, bits and pieces and a strong magnet.
The magnet holds the loose arm to the body panel when not in use.


4. Panel bracing
The lower side panels, both sides, have been replaced sometime in the past and seemed a bit flimsy...they also moved quite a bit when pressed. Decided to add some bracing  to the area that sits behind the inner door panels. Added two braces per side with a strip of pipe lagging between the brace and the panel. To ensure the brace fastening at the door opening did not clash with the door sealing strip the fastening screw passes through about a one inch length of tube and screws directly into the spar. (6 mm tapped hole) This allows for the door seal to clear the brace. The spars where tweaked by hand to give some tension on to the panel.


5. Gear lever gaiter
Added a gear lever gaiter and securing ring from an MG-B sports car. (I used to have one of these...MGB GT that is). The gaiter is a good to tight fit on the lever shaft and the retaining ring will just fit in the space available.


6. Ashtray
I can't believe an ashtray was not part of the essential 1960's standard kit...so I have added one. It bolts on to the drivers tray and swivels away when not wanted... told it was from a Morris Minor van originally...so it could have been part of the options list? 


A tale of two carbs!

Jan 2016

And the saga continues into 2016....the year I hope to get my 'George' back on the road!

A little while age I bought a 'new' Solex 30 AHG carb from Ebay. As you may have done as a number were on sale.  At just £50 it seemed an offer not to miss and would do for spares if nothing else. When it arrived it was clearly new and unused and I was very pleased with it.

However comparing the jet sizes with the Solex leaflet I had for the JB van there were some clear differences. Three of the jet sizes were not as the leaflet and the choke tube was larger than the 21 m/m stated. Otherwise outwardly the carb look identical to the leaflet and to the one already fitted to my van engine.

So I put it aside for later consideration.

Last week in an attempt to get the engine to run better I removed the old carb and stripped it down to give it a good clean. I did find quite a lot of dirt in the main jet which was probably the cause of the rough running.

While I had the carb apart I did compare all the jet sizes with the Solex leaflet and the 'new' carb I purchased.

To my surprise the old carb and the new carb were identical in all respects! All jet sizes and the choke tube match.

So I replaced old with new and all works fine.

Does anyone know why the jet /choke sizes are different to the leaflet? My engine is a gold seal replacement (48G55AD) 

See below for the actual size differences. 

So if you also recently purchased a 'new' Solex 30 AHG do check your old carb and not rely on the Solex leaflet. 

Different sizes shown in RED below