
Just a note, in case it helps others, on replacing the axle pinion oil seal.
Only done a few short trips, to gain confidence in the van's reliability and to help me get to grips with it, when I realised that oil was seeping from the back axle quite quickly, seemed to be dripping from the drain plug. Upon closer inspection it was getting past the pinion seal and dripping off the drain plug.
So back in the garage.
To replace the rear axle pinion oil seal. (My version)
1. Without jacking the van up, undo the 4 nuts holding the prop shaft universal to the axle flange and remove the bolts. Roll the van a few feet to turn the axle to get at all of the 4 nuts.
2. Slide the prop shaft a little towards the gearbox sufficient to separate the joint and drop the rear of the prop shaft to the ground. (I removed the prop shaft from the gearbox also as I wanted to inspect the universal joints but there is no need to do this if just changing the pinion seal. If you do remove the prop shaft prepare to catch lots of gearbox oil, or drain the gearbox first.
3. Mark the position of shaft to flange with a centre pop on each and mark the position of the nut to flange with paint..
4. Undo the pinion nut and remove it and the washer. I used 2 spare bolts in the flange holes and a bar extension in contact with the garage floor to prevent the flange from turning. Needed an extending car jack handle on socket to effect release and all my 70+ years of muscle!
5. Pull the flange off the pinion shaft to expose the seal. Mine came away by hand force only.
6. Remove seal from axle casing. I used a large screwdriver to do this.. Seal was very hard and brittle! Don't be surprised if the pinion seems loose at this stage as it sits in a tapered bearing and as this separates the pinion is very sloppy!
7. Get a new seal. Got mine from 'oilsealman' on ebay. Seal number NA319 C520. This is 2.75 inch OD and suits 1.50 inch shaft. It has a metal outer casing on one half.
8 Fit the new oil seal. Tapped mine in with a nylon mallet until flush and then used a small bolt, hex head against the seal, to tap the seal approximately 3 mm below the flush position. Why? The flanges 1.5 inch diameter shaft sealing surface had about 0.010 inch wear caused by the old seal so by positioning the new seal differently I am hoping it will contact an unmarked part of the shaft.
9. Re-assembled everything and topped up back axle oil.
 |
Flange showing wear. |
 |
Seal removed exposing tapered bearing |
 |
New seal installed |
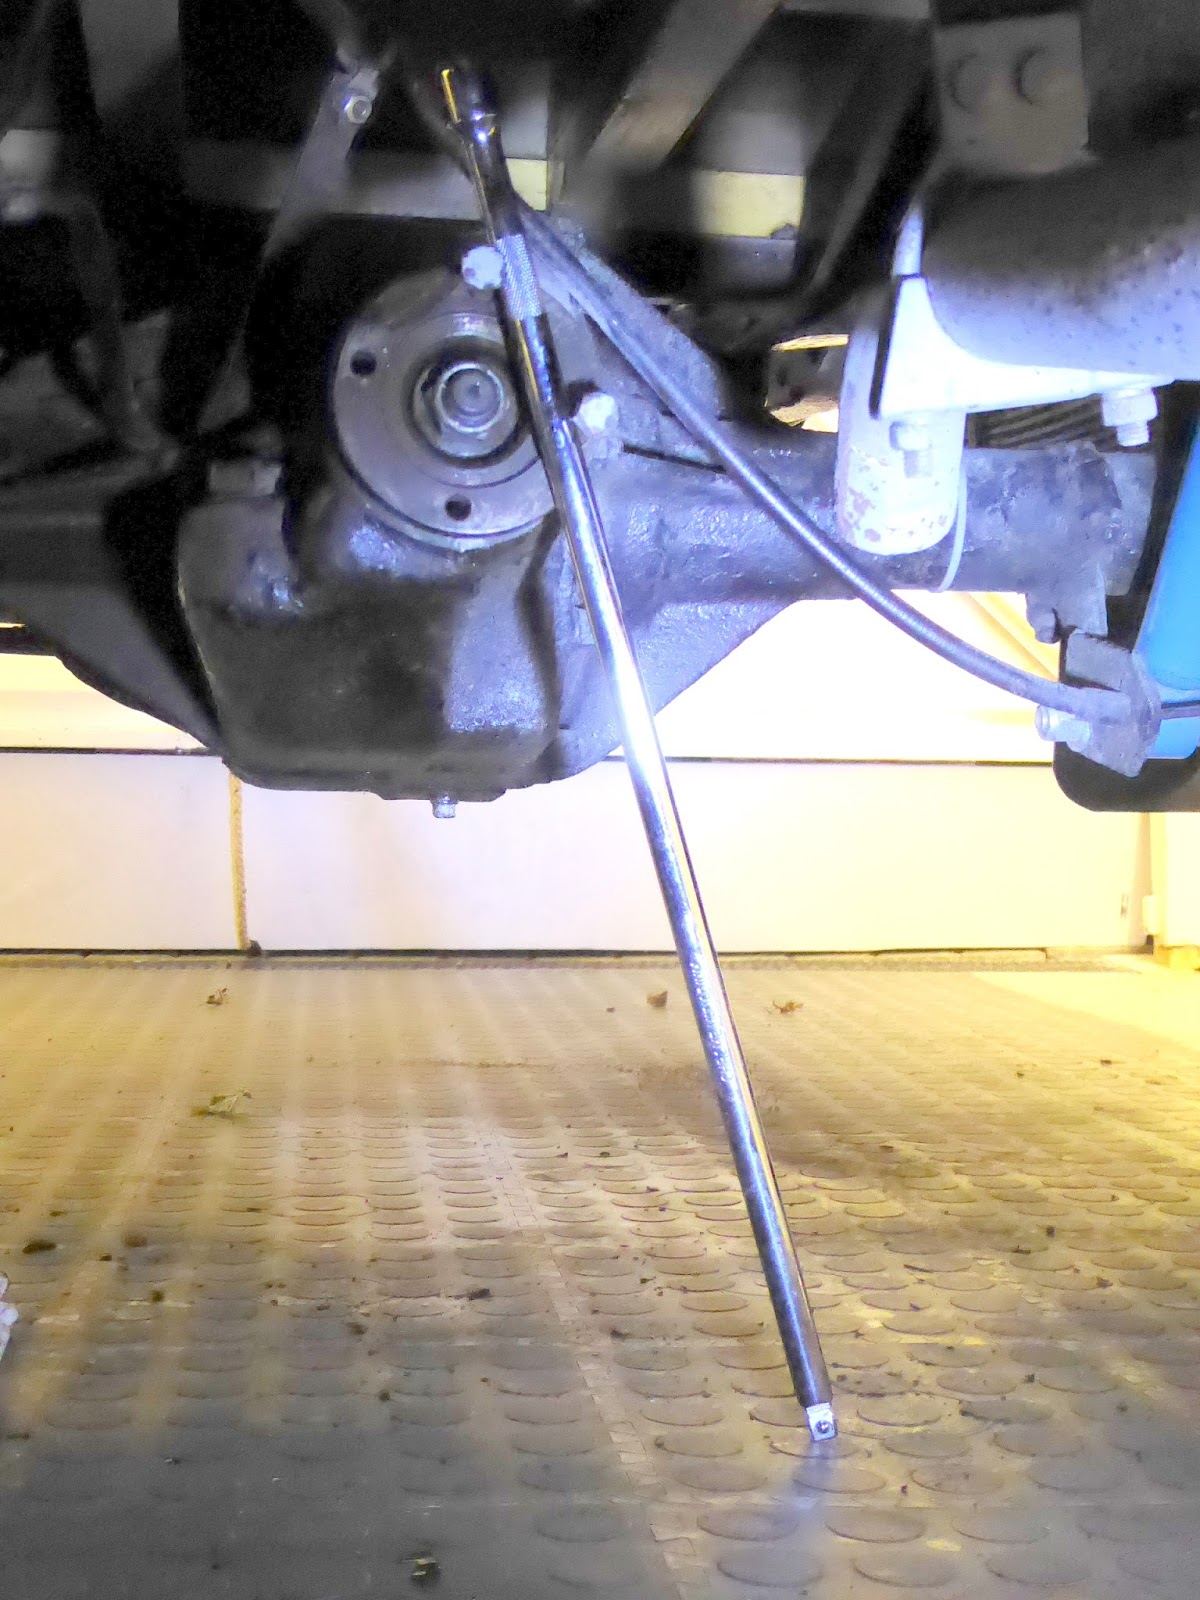 |
Position of brace -nut tightening position |
 |
Seal NA319 C520
|
No comments:
Post a Comment